
As organizations move away from VMware’s rising licensing costs and closed ecosystem, Proxmox VE has become a leading open-source virtualization platform offering flexibility, performance, and infrastructure control.
At Belcloud, we provide free migration guidance to all incoming customers. Every migration project includes a dedicated engineer who assists with assessment, planning, migration execution, workload validation, and post-migration optimization.
Our goal is to ensure a smooth transition with minimal downtime, zero data loss, and stable production performance throughout the migration process.
Organizations are adopting Proxmox VE for lower virtualization costs, open-source flexibility, native clustering and high availability, integrated backup and replication, and support for enterprise storage technologies such as ZFS and Ceph.
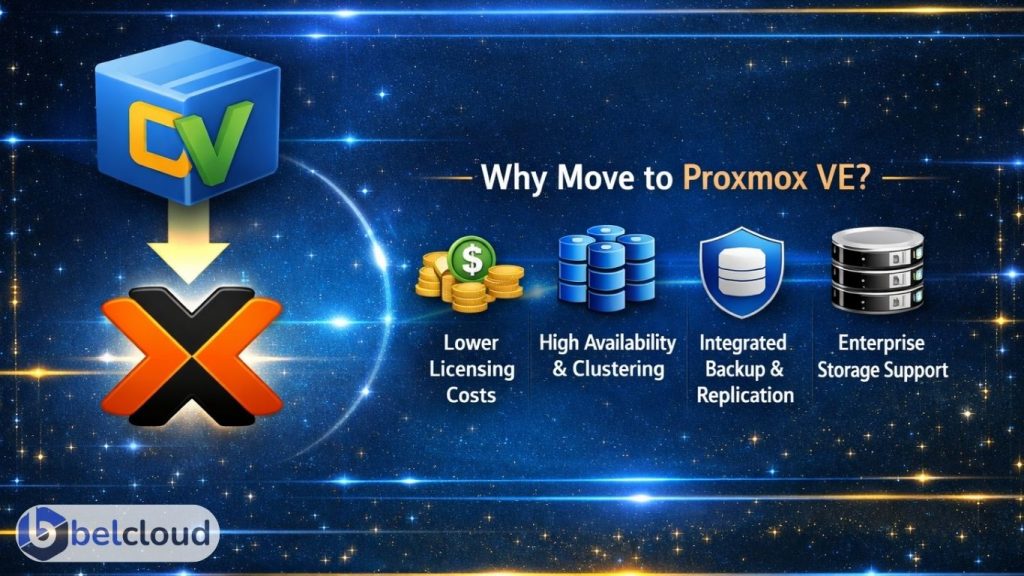
Why Organizations Are Moving to Proxmox VE
Proxmox combines KVM virtualization, LXC containers, software-defined storage, clustering, and centralized web management into a single platform suitable for SMB and enterprise environments.
With properly configured NVMe storage and VirtIO drivers, Proxmox workloads can achieve near bare-metal performance with sub-millisecond latency and multi-gigabit network throughput.
Migration Overview
A successful VMware to Proxmox migration involves more than converting virtual disks. Proper planning is critical to avoid downtime, storage corruption, networking issues, or failed workloads.
The migration process typically includes infrastructure assessment, backup and rollback validation, VM compatibility checks, storage and network mapping, migration execution, performance testing, and post-migration optimization.
Migration speed depends heavily on storage throughput, network bandwidth, and snapshot size. Environments using 10GbE networking with NVMe-backed storage commonly migrate workloads at several hundred GB per hour.
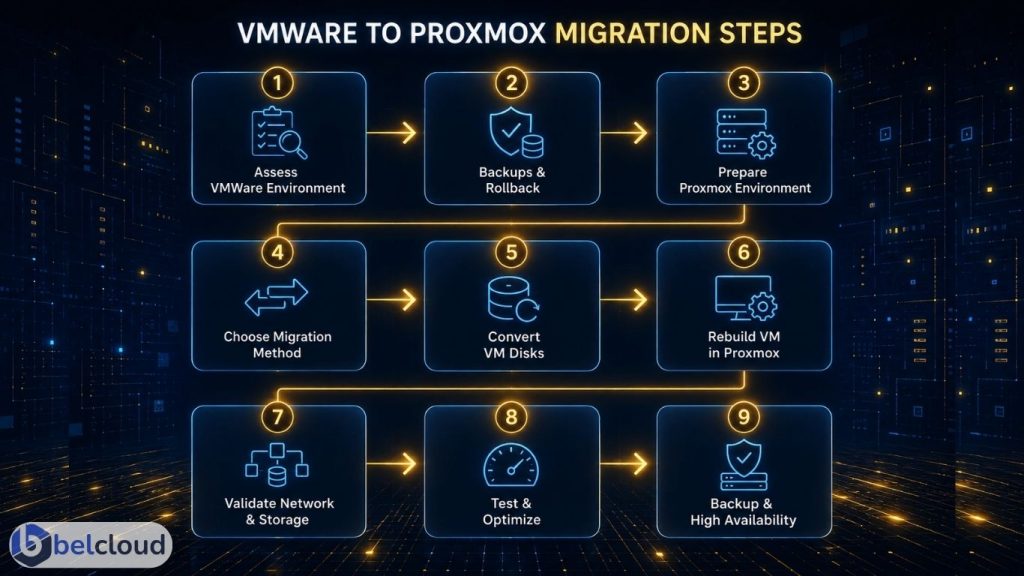
Step 1: Assess the VMware Environment
Begin with a complete inventory of the existing infrastructure. Review virtual machines, operating systems, CPU and memory allocation, datastore usage, snapshots, and BIOS or UEFI configuration. Networking assessments should include VLANs, vSwitch configuration, MTU settings, firewall policies, and IP assignments.
Storage assessment should cover SAN/NAS topology, RAID configuration, SSD or NVMe tiers, and replication methods. Workload dependencies such as Active Directory, databases, backup systems, and licensing servers should also be identified before migration begins.
Step 2: Create Backups and Rollback Plans
Before migration begins, create and validate full VM backups. Recommended practices include exporting OVF/OVA configurations, verifying backup integrity, storing backups outside production datastores, and documenting rollback procedures.
Typical enterprise targets include near-zero RPO and RTO objectives ranging from minutes to hours depending on workload criticality. Modern NVMe repositories and 10GbE backup networks can significantly reduce backup and restore times during migration windows.
Step 3: Prepare the Proxmox Environment
The Proxmox cluster should be fully configured and production-ready before workloads are migrated.
Recommended configurations include: SSD or NVMe-backed storage, Redundant networking, Secure management access, VLAN-aware bridges, LACP bonding, ZFS, Ceph, NFS, or iSCSI storage
For storage and replication traffic, 10GbE networking or higher is strongly recommended.
Typical infrastructure throughput:
- 1GbE networking: ~125 MB/s
- 10GbE networking: ~1.1 GB/s
- NVMe Gen4 storage: 5,000 to 7,000 MB/s read speeds
These speeds directly affect migration duration, replication performance, and VM responsiveness after cutover.
Step 4: Choose the Migration Method
Offline migration is the most common approach and works well for environments with planned maintenance windows. This method involves shutting down the VM, exporting the VMDK, converting disks, importing them into Proxmox, and validating the workload after boot.
Near-live migration methods reduce downtime but require additional synchronization, replication, and validation planning. These methods are typically used for production-critical workloads.
In optimized environments, offline migrations commonly transfer between 200 GB and 1 TB per hour depending on storage backend and network speed.
Step 5: Convert VMware Disks
VMware environments commonly use VMDK disk formats, while Proxmox typically uses RAW or QCOW2. Disk conversion is usually performed using qemu-img.
RAW offers maximum performance, while QCOW2 supports snapshots and thin provisioning. Conversion speed depends on CPU resources, storage performance, and network throughput. Enterprise NVMe systems can convert several hundred GB per hour, while slower SATA arrays may significantly increase migration time.
Step 6: Rebuild VM Configuration in Proxmox
After importing disks, rebuild the VM configuration inside Proxmox. This includes CPU type, NUMA configuration, memory allocation, VirtIO drivers, SCSI controller settings, and boot configuration. Install the QEMU Guest Agent and remove VMware Tools after validation is complete.
VirtIO drivers improve throughput, reduce latency, and increase disk IOPS performance while reducing CPU overhead.
Step 7: Validate Networking and Storage
After booting migrated workloads, validate networking, DNS resolution, VLAN communication, storage mounts, and application functionality.
Common migration issues include MTU mismatches, incorrect bridge mappings, missing VirtIO drivers, and firewall conflicts. Application and database consistency checks should also be completed before production cutover, especially for latency-sensitive workloads.
Step 8: Performance Testing and Optimization
Post-migration benchmarking is critical to ensure workload stability. Validate storage throughput and latency, network throughput and failover, CPU and RAM utilization, and application response times.
Performance can be optimized further using NVMe-backed storage pools, ZFS tuning, CPU pinning, and VirtIO optimization. Well-configured Proxmox clusters commonly deliver near bare-metal virtualization performance with high IOPS capability and low-latency storage access.
Step 9: Configure Backup and High Availability
Once workloads are validated, configure backups, replication jobs, retention policies, and HA groups.
Commonly deployed monitoring and backup tools include Proxmox Backup Server, Zabbix, Grafana, and Prometheus. Fast backup repositories and high-speed replication networks help reduce failover and recovery times while improving infrastructure resiliency.
Common Migration Pitfalls
The most common migration failures are caused by poor preparation and incomplete validation.
Common issues include incomplete backup verification, incorrect VLAN mapping, legacy driver incompatibility, oversized VMware snapshots, and missing rollback procedures. Large snapshot chains and slow storage backends can significantly increase migration time and impact overall cutover performance.
Migrating from VMware to Proxmox VE can significantly reduce infrastructure costs while improving scalability, flexibility, and operational control.
Successful migrations require proper engineering oversight, thorough validation, performance optimization, and careful risk management.
At Belcloud, we help organizations migrate safely and efficiently with dedicated engineering support throughout the entire process, ensuring workloads remain stable, secure, high-performing, and free from data loss.
Ready to migrate? Contact Belcloud today to start your VMware-to-Proxmox transition: belcloud.net